 If you click Record without
specifying the name of the presentation, the presentation will use input
priorities and encoding settings specified in the default presentation setting.
For more information, see Select a Default Presentation
Setting.
You can record local presentations without connecting to Mediasite or a media server. Local presentations use presentation settings, created on the Recorder, with pre-defined encoding settings for each stream.
To record a local presentation, you can simply click Record to start recording without specifying the name of the presentation. You can also select New to specify the name and presentation setting before you begin recording.
 If you click Record without
specifying the name of the presentation, the presentation will use input
priorities and encoding settings specified in the default presentation setting.
For more information, see Select a Default Presentation
Setting.
To record a local presentation:
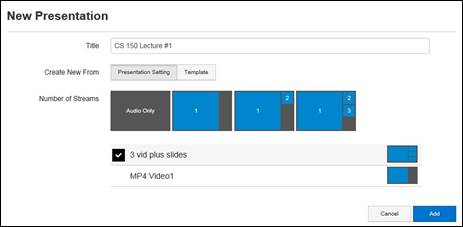
1. Click New. The New Presentation dialog box appears.
2. Enter the name for the new presentation and select a presentation setting. If you do not have any presentation settings, you will be prompted to create one. For more information, see Create Presentation Settings. Also, if you have a large number of settings, you can filter them by the number of streams.
3. Click Add. The new presentation is loaded onto the Recorder for recording.

Capture tab, create new local presentation
4. Click Record to start recording the presentation.
5. Use the output routing feature in the Inputs tab to switch input sources to different outputs while a presentation is recording.
6. Click Pause to stop recording temporarily, for example, if you want to change cameras. Click Record to resume recording.
 The video fades to black when you pause
recording and transitions out of black once you resume recording. While the
presentation is paused, the last image captured is displayed and the audio is
muted.
7. Click Stop to stop recording the presentation. Once the recording has stopped completely, the recorded presentation will be listed in the Presentations tab.