 When using a CSV file, you
can specify only one presenter and one module. You cannot specify permissions
for the module. Recurrence should be set to “one-time only”.
When using a CSV file, you
can specify only one presenter and one module. You cannot specify permissions
for the module. Recurrence should be set to “one-time only”.
You can import schedules by creating and then importing an XML or CSV file containing schedule and recurrence details to Mediasite. Importing schedules is useful when you have to create multiple schedules.
When using a CSV file, you
can specify only one presenter and one module. You cannot specify permissions
for the module. Recurrence should be set to “one-time only”.
Step 1: Create your own schedule files using sample files
Use the example import schedule files to create your own import schedules. These files can be found in the Mediasite installation directory but can also be accessed using the sample file’s URL:
 The sample files are only for reference
and cannot be imported. For more information on the schedule import
options, including security and visibility, see KBA000003781
available on the Customer Care Portal at
https://www.sonicfoundry.com/support.
The sample files are only for reference
and cannot be imported. For more information on the schedule import
options, including security and visibility, see KBA000003781
available on the Customer Care Portal at
https://www.sonicfoundry.com/support.
Step 2: Import schedule file
To import a schedule file:
1. Click Content and navigate to the folder in which you want to add the schedule. Right-click folder and select Add Schedule. Alternatively, you can click a time slot in the Calendar or Availability view to initiate this task.
2. On the Add Schedule page, click Import and specify the following:
|
Options |
Details |
|
Presentation Template |
Select the template you want to use for the schedules. |
|
Import File |
Click Select a file to navigate to and choose the import file you want to use. |
|
Allow folder overrides in the schedule import file |
Select this option if you want to specify different folders and presentations. For example, if there are some schedules that need to go into a different folder or use a different template, you can update them as needed. The remaining schedules will use the folder and template selected above. |
3. Click Select to browse to and select the XML file containing that data you want to import. Click Next.
4. On the Confirm Schedule Creation page, click Finish. The newly created schedules are listed in the folder.

Specify the template and import file

Sample import schedule file
When you create a schedule that does not have a Recorder associated with it, you must create the presentations manually for recording. Once you create presentations, they are listed on the schedule’s properties page and in Management Portal and can be opened for recording in the same manner as other presentations.
To create presentations for schedules not associated with a Recorder:
1. On the schedule’s Summary page, click More > Presentations > Create Presentations. The Create Presentations dialog appears.
2. Click the Create Through field and use the calendar to specify an end date for creating presentations and click Create. Mediasite creates presentations based on the schedule’s recurrence up until the end date specified.
3. When the summary of presentations created successfully appears, click OK.
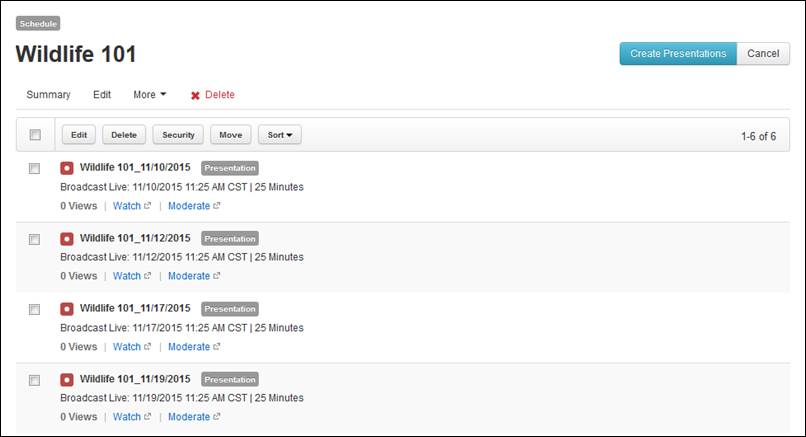
Manually create presentations for schedules without Recorders
When deleting a schedule’s events on the Recording Calendar, you have the option of deleting a single event, multiple events, or the entire schedule. When an event is deleted, the scheduler does not create the presentation(s) associated with it. This is useful if you want to exclude dates in a schedule without creating a global exclude date, if you suddenly cancel presentations, or if you want to schedule a different presentation at that time. Deleted presentations are grayed out in the recording calendar.
To delete scheduled events:
1. Navigate to the scheduled event, click it, and click Delete.
2. When the confirmation message appears, click the button that best fits which events you want to delete:
|
Options |
Details |
|
This instance |
Delete the event scheduled for that time. |
|
All events |
Delete schedule. |
|
All following |
Delete all events scheduled after the selected event. |

Delete event options, availability or weekly view
Before you can delete all events,
which deletes the schedule, you must delete all unrecorded presentations
associated with the schedule. For more information, see Delete schedules.
When events in a schedule are cancelled, they can be restored if they do not overlap with another event that may have been scheduled in its place.
To restore a cancelled event:
1. Navigate to the cancelled event, which will be grayed out in the grid. Click the cancelled event to view its schedule task menu. Click Restore.
2. When the confirmation message appears, click Yes. The cancelled event is restored.

Restore cancelled schedule event
Before you can delete a schedule and all the events (recurrences) associated with it, you must first delete all its unrecorded presentations. You must then permanently remove these presentations from the Recycle Bin.
To delete a schedule:
1. Navigate to the schedule and click it to view its summary page. Click More > Presentations to view all presentations associated with the presentation.
2. Select the check box next to each unrecorded presentation and click Delete to send them to the Recycle Bin.
3. Go to the Recycle Bin and permanently delete the presentations.
4. Navigate back to the schedule and delete it or delete it using the recording calendar.
 If a schedule still does not delete,
then your Mediasite administrator may have to run the deletion job: Settings > Server Settings >
Recycle bin.
If a schedule still does not delete,
then your Mediasite administrator may have to run the deletion job: Settings > Server Settings >
Recycle bin.