Editor’s workspace
The workspace has four areas—left video preview, right
video/slide preview, project timeline, and project/revision
history—so that you can easily preview, navigate, playback, and edit your
presentations as well as manage different projects. With two video preview
windows, you can select which video source appears in each of the windows and
navigate the presentation to the points where you would like to make your
changes using the playback controls, slide controls, or project timeline.
 As you edit your content,
you can adjust the size of the Web Editor workspace as well as resize all
workspace areas individually. To adjust the size of an area, use the “resize
area” buttons. For example, to adjust the size of the project timeline relative
to the preview windows, drag the vertical “resize area” button
As you edit your content,
you can adjust the size of the Web Editor workspace as well as resize all
workspace areas individually. To adjust the size of an area, use the “resize
area” buttons. For example, to adjust the size of the project timeline relative
to the preview windows, drag the vertical “resize area” button  .
.
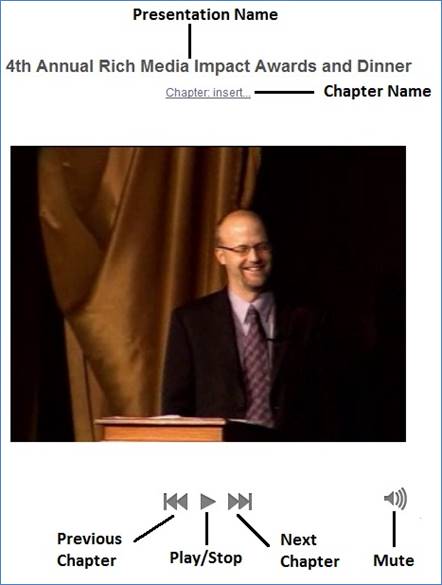
Left video preview area
The video source selected in the
left video preview window is the source you will use to edit the presentation.
The video thumbnails associated with the selected video source appear in the
project timeline along with the presentation’s audio waveform and slide images.
You will use the controls in this area to navigate and playback the selected
video source as well as the audio associated with the presentation.
In addition to the preview window and playback controls,
you will also find a mute button, the presentation name, and the current chapter
name or a link for inserting a chapter. Chapters are markers within a
presentation that allow your audience to navigate to specific points in a
presentation. Once chapters are added, controls for navigating the chapters are
also available.
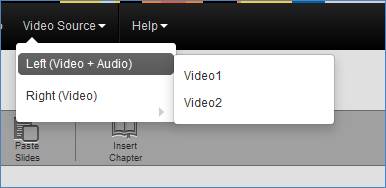
Left video preview area
Select left video source
If there are multiple video streams, you will select the
video source you want to edit as the left video.
Go to Video Source > Left (Video + Audio)
to select the video source you want. The number of video sources available in
the list will vary by presentation.
Select left video source
 A single audio source and slide
stream is associated with all video sources used in the presentation.
Additionally, regardless of the video source select in the left video preview
window, all edits made are applied across all video sources as well as the audio
and slides at the same point in the timeline.
A single audio source and slide
stream is associated with all video sources used in the presentation.
Additionally, regardless of the video source select in the left video preview
window, all edits made are applied across all video sources as well as the audio
and slides at the same point in the timeline.
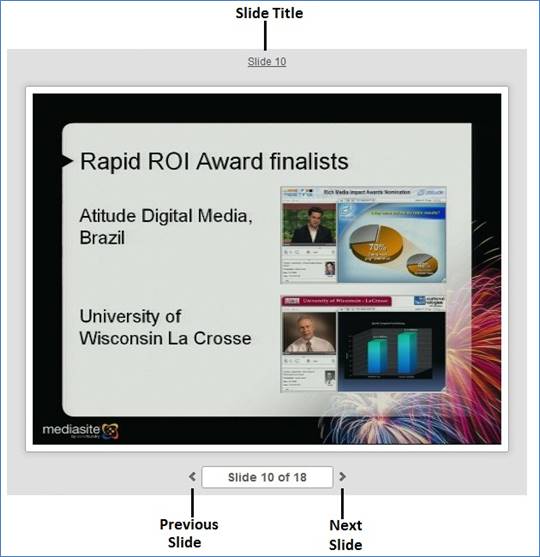
Right video/slide preview area
In the right video preview area, you can display any of the
available video sources as well as
the presentation’s slides. The slide controls are also available in the right
video preview area. Navigate the slides using the controls or simply enter a
number in the number list to jump to a specific slide. You can also update a
slide’s title and add a description by clicking the slide title.
If a slide has not been given a title, click Untitled
Slide to add a slide title.
Right video/slide preview area
Select the right video
source or slide
Go to Video Source > Right (Video) to
select the video source or slide you want to display in the right video preview
window. The number of video sources available in the list will vary by
presentation.
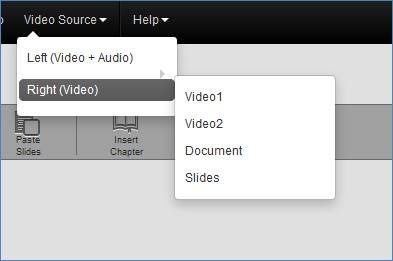
Select right video source
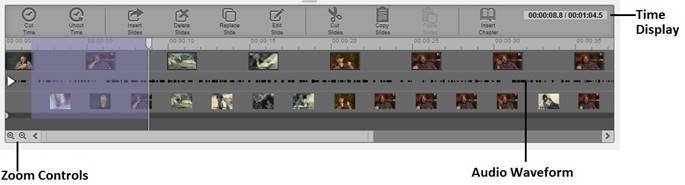
Project timeline
The Web Editor’s project timeline allows you to navigate
through the presentation-enter a time in the time display or click anywhere in
the timeline to navigate to that point in the presentation. It also allows you
to edit, move, and replace slides, hide or display slide thumbnail images, add
chapters, and insert cuts, fades, and dissolves.
The project timeline includes an audio waveform that
provides a visual representation of a presentation's audio levels. This feature
is useful for quickly detecting and removing long periods of silence in
presentations. Enter a time in the time display or click anywhere in the
timeline to navigate to that point in the presentation.
Project/Revision History
view
You will manage your project and revisions in the
project/revision history area. Click Projects to manage the projects
associated with the presentation you launched the Editor against. In the project
view, you can open, copy, delete, and restore projects as well as open new ones.
Click Revision History to see a listing of all changes made in a project
and to restore (go back to) a previous revision.
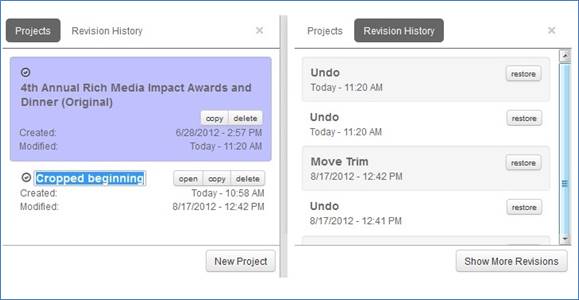
Project and Revision History windows