You can add links to external websites or documents, closed
captions, thumbnail images, chapters, and alternate slide text to the
presentation.
Add hyperlinks to your presentation that allow your
audience to view other websites or online documents. This is useful if you would
like to provide your audience with information that supplements the subject
matter being discussed in the presentation. Hyperlinks can be added to the
presentation before or after the presentation is recorded and published to the
Mediasite.
To add a link to a presentation:
1.
Navigate to your presentation, click Edit, go to the
Information tab, and click in the Links field.
2. Enter
the link’s name and the URL for the document or website to which the link
will point. Click Add. Repeat this step for each link
you want to add.
3. Click
Save.

 Presentation properties page
(Information tab), add links to presentation
Presentation properties page
(Information tab), add links to presentation
Add closed captions
You can add closed captions to on-demand presentation by
creating closed caption files and linking them to the presentation. You can
create the files yourself using third-party captioning software or you can use a
captioning service.
All player layouts support presentations with closed
captions added. In addition, users can search closed caption text in players,
catalogs, and showcases for specific words and phrases.
Considerations when adding closed captions
When adding captions to a presentation manually or using a
captioning service, consider the following:
•
Mediasite supports Synchronized Accessible Media Interchange (SAMI),
SubRip (SRT), and Distribution Format Exchange Profile (DFXP).
•
Sonic Foundry does not provide SAMI, SRT, or DFXP files or tools for
authoring them.
•
Non-English captions must be saved with
UTF-8-character encodings. For more information, see KBA 4029 on the
Customer Care Portal.
•
Mediasite supports begin and end times in DXFP so you can specify
expiration times, that is, how long captions remain on screen.
•
Captions are centered and appear directly below the video window even
when player is enlarged.
To add closed-captioning to an on-demand
presentation:
1. Navigate to your presentation. Click Edit and go to the Delivery
tab.
2. If you
have not already enabled captioning, select the Audio
Transcriptions check box.
3. Select
the Manual Upload radio button and click Select a file to locate and select your closed caption file.
Click Upload. Click the Save button.
4. Once
the file is uploaded, launch the presentation in Mediasite Player and verify
your captions appear as expected.

Add closed captions to presentation
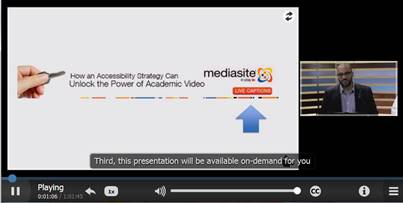
Presentation with captions
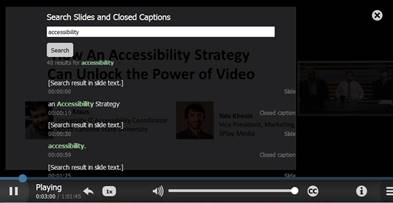
Searching presentation with
captions
 Mediasite allows users to
submit and monitor captioning requests through Automatic Sync Technologies®
(AST), 3Play Media, and other captioning services using the credentials for an
existing account. For more information, see Using automated captioning. You can also
use Caption Editor, available in My Mediasite to create and edit captions.
Mediasite allows users to
submit and monitor captioning requests through Automatic Sync Technologies®
(AST), 3Play Media, and other captioning services using the credentials for an
existing account. For more information, see Using automated captioning. You can also
use Caption Editor, available in My Mediasite to create and edit captions.
Mediasite automatically generates a thumbnail from a
presentation’s video. However, you can always upload a custom thumbnail image to
replace the auto-generated one.
To add a thumbnail image to a presentation:
1.
Navigate to your presentation. Click Edit and go to
the Delivery tab.
2. Click
Select a file and navigate to the image file you want
to use for the thumbnail. Click Save.

Add custom thumbnail image
Once you record and publish a presentation to Mediasite,
you can add slide descriptions and slide titles to the on-demand presentation
using Management Portal. Slide descriptions—text describing slide content—may be
displayed in place of slide images and can be read by text readers.
To add slide titles and descriptions:
1.
Navigate to your presentation and click Edit Slides.
This launches the Slide Editor.
2. Click
on a slide to enter a title and description for it. Optionally, select the Set as thumbnail check box to make this the thumbnail image
for the presentation. Click Save.
3. Once
you are done, click Back to exit the Slide Editor.

Slide Editor, add slide titles and
descriptions
 You can also add chapters to an
on-demand presentation using the Mediasite Editor. Chapters are an organized
list of key parts of a presentation that allow a viewer to navigate easily to
points of the presentation that are most relevant or important. For
information on adding chapters to an on-demand presentation using the Web
Editor, see the Editor Help file.
You can also add chapters to an
on-demand presentation using the Mediasite Editor. Chapters are an organized
list of key parts of a presentation that allow a viewer to navigate easily to
points of the presentation that are most relevant or important. For
information on adding chapters to an on-demand presentation using the Web
Editor, see the Editor Help file.