Create “Mediasite import” OAuth app in Zoom
You will use the client ID and secret generated by the
OAuth app when you create Zoom import projects in Mediasite.
 You must specify the basic media import
project settings (described below) before you begin creating this app. Once you
choose Zoom Import as the project type, the Redirect URL for OAuth displays.
This URL is required when configuring the OAuth app. The Redirect URL for OAuth,
has the following format: https://<Mediasite Root
URL>/Integrations/OAuth. Example:
https://myserver.mynetwork.net/Mediasite/Integrations/OAuth
You must specify the basic media import
project settings (described below) before you begin creating this app. Once you
choose Zoom Import as the project type, the Redirect URL for OAuth displays.
This URL is required when configuring the OAuth app. The Redirect URL for OAuth,
has the following format: https://<Mediasite Root
URL>/Integrations/OAuth. Example:
https://myserver.mynetwork.net/Mediasite/Integrations/OAuth
To create your “Mediasite import” OAuth app:
1. Log
into Zoom Cloud as an administrator and click Advanced > App Market
Place. Navigate to the Develop drop-down menu and select Build
App.
2. On the
Choose your app type page, navigate to OAuth and click
Create.
3. On the
Create an OAuth app page, specify the following
settings, disable publishing your app to the Zoom App Market place, and click
Create:
|
Settings |
Details |
|
App Name |
Enter a name that you and other users can identify
easily, for example, OAuth_MediasiteImport. |
|
Choose app type |
Select Account-level
app. |
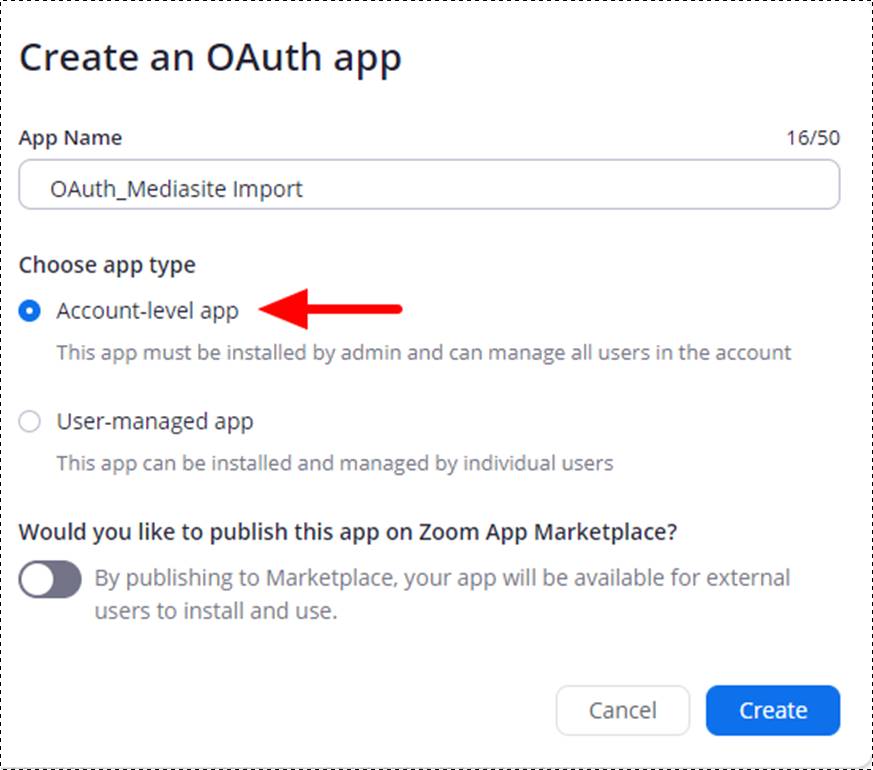
Create OAuth app for use with Mediasite Import
4. On the
App Credentials page of the Wizard for your newly
created OAuth app, specify the following information and click Continue:
|
Settings |
Details |
|
Client ID/Client
Secret |
Copy and paste these values in the media import
project you are creating in Mediasite. |
|
Redirect URL for
OAuth |
Copy and paste the Redirect URL for OAuth URL found
on the media import project page in Management Portal. |
|
Add Allow Lists |
Copy and paste the Redirect URL for OAuth URL found
on the media import project page in Management
Portal |

Specify OAuth information in media import project and on App
Credentials page
5. On the
Information page of the Wizard, specify basic details
about the app that will help you users understand its purpose. The short
description, long description, company name, and developer contact information
are required. Click Continue.
6. On the
Feature page of the Wizard, no changes are required so
click Continue.
7. On the
Scopes page of the Wizard, click Add Scopes, navigate to the scopes listed below, select the
one you want, and specify the following. Click Done
when you have finished. Click Continue.
|
Options |
Details |
|
Meeting |
Select View all user
meetings. |
|
Account |
Select View account
info. |
|
User |
Select View all user
information. |
|
Recording |
Select View all user
recordings. |
|
Webinar |
Select View all user Webinars (only required
if your organization uses Zoom Webinars) |
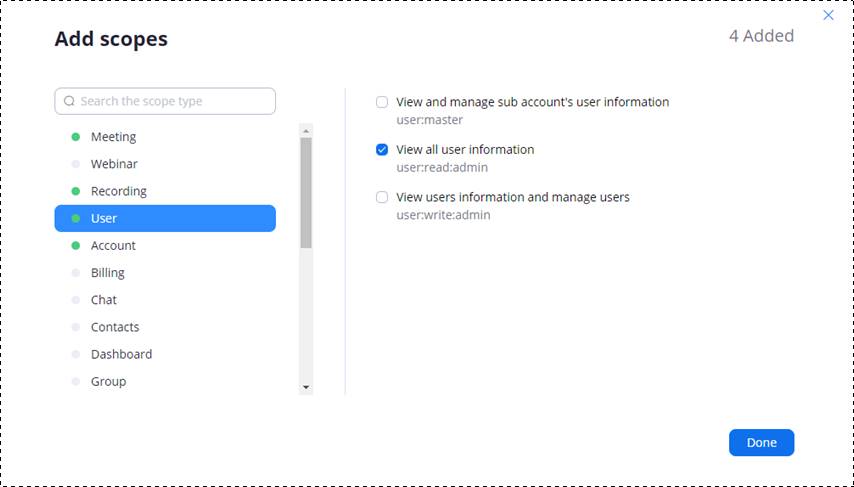
Add OAuth app scopes
8. Exit
the Wizard. Installing the OAuth app you just created is not required.

Install OAuth app