You will aggregate content into new channels the same way you did with other channels: automatically by linking to a Mediasite folder or using a search term and manually using a presentation’s Publish tab.
To add a new channel to a showcase:
1. Click Publishing > Showcases and locate the showcase you want.
2. On the showcase’s properties page, click Channels > Add Channel > Add New Channel.
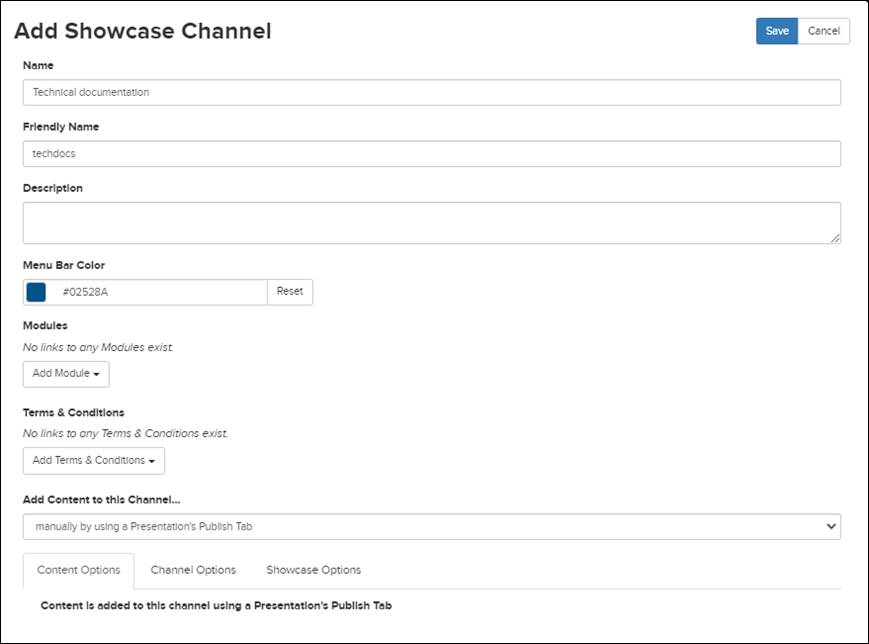
3. On the Add Showcase Channel page, enter a name and description for the channel that will help you and other users identify it easily.
4. Specify a Friendly Name for the channel to customize its URL. This value will replace the channel ID number in the URL.
5. Click in the Menu Bar Color field to update the color that will be used for the channel’s menu by entering the color code or using the color selector.
6. If modules are available on your system, click Add Module to search for and select the modules you want to associate with this channel. This is useful if the channel will be associated with a course.
7. From the Add content to this channel...drop-down list, select the aggregation method you want to use:
|
Settings |
Details |
|
Automatically by linking to a Mediasite folder |
Select this option to aggregate content in a channel by linking it to a Mediasite folder. All presentations in the folder and its sub-folders are visible in the channel at the same level since channels are flat lists. In addition, all permissions assigned to presentations carry over to the channel. You can optionally filter the linked channel using a search term.
Click in the Link to Folder field to see a list of available folders or use the search feature. Click on a folder to select it. |
|
Automatically by using a search term |
Select this option to aggregate content in a channel by automatically discovering presentations matching specific search criteria. When you create a search-based channel, it will only include presentations you have read and write permissions on. Specify the search term and select the check box next to the presentation metadata you want included in the search. For example, if you want to search only titles and tags, select the check box next to each of these items. |
|
Manually by using a presentation’s Publish tab |
Select this option to aggregate content in a channel by allowing users to add presentations to it using the Publish tab. Since this method allows multiple users to add content to the channel, you can optionally link terms and conditions to it. Users must accept the terms specified to publish content to the channel. Once you select this option, click Add Terms & Conditions and select the terms and conditions agreement you want to associate with this channel. Users must accept this agreement before they can publish to this channel. |
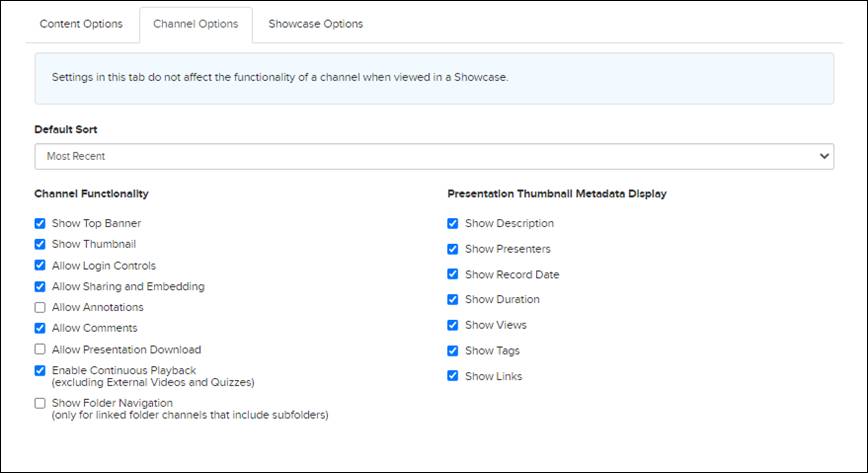
8. Click Channel Options to specify the features that will be available in the channel, to show folder navigation (only for channels linked to folders with subfolders), and to select what presentation metadata will be displayed.
 Some features, such as continuous playback
can be set on a channel, but do not apply when a channel is included in a
showcase. In this case, you need to globally enable continuous playback on
the showcase, which turns this feature on for all channels in the showcase. For
more details on the features included in Channel Options, see Adding new
channels.
Some features, such as continuous playback
can be set on a channel, but do not apply when a channel is included in a
showcase. In this case, you need to globally enable continuous playback on
the showcase, which turns this feature on for all channels in the showcase. For
more details on the features included in Channel Options, see Adding new
channels.
9. Click Showcase Options and specify the following:
|
Settings |
Details |
|
Viewable in Showcase |
By default, the channel will be visible in the showcase. If you want to hide the channel while you add content, clear this check box. |
|
Use Showcase Registration |
Select this check box to require users to register before they can view presentations in this channel. |

10. Click Save.