To create Recorder rooms automatically:
1. Click Recording > Room Configuration and navigate to the Recorder room configuration you want.
2. Directly below the configuration’s title, click Create rooms.
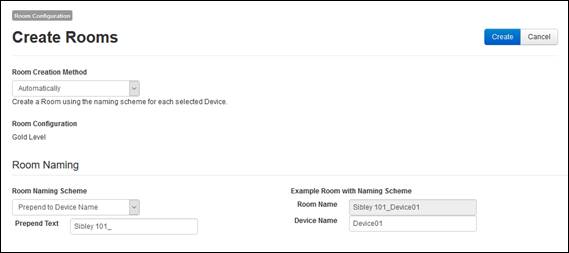
3. Select Automatically from the room Creation Method drop-down list.
|
Use Device Name |
Select this option to use the device’s name. |
|
Append to Device Name |
Select this option to add text to the end of the device’s name. Enter the Append Text. |
|
Prepend to Device Name |
Select this option to add text to the beginning of the device’s name. Enter the Prepend Text. |
|
Replace Device Name |
Select this option if you want to use a different name for the are using a naming scheme for your devices in your organization but want to use a different scheme when users access the devices using Record Now. Enter the values for the text that will be replaced and the replacement text in Find Text and Replace With, respectively. |
Create new room, room creation method and naming settings
 For more information on the room
Location Metadata server settings, see Add room location labels
(optional).
For more information on the room
Location Metadata server settings, see Add room location labels
(optional).
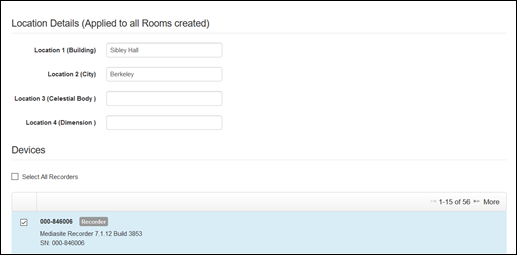
Create new room, specify location details and select device
7. Click Create. A confirmation message indicating the successful import of the devices (using the naming convention you selected) appears. Click Close.
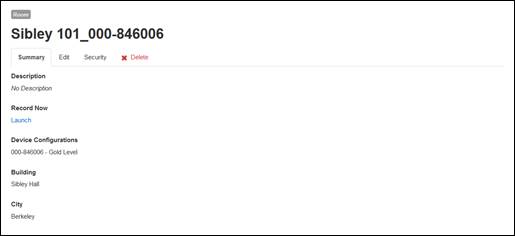
Recorder room summary page