Once you have created a channel, you can edit it as needed. There are additional settings available when editing your channels. Once you no longer need the channel, you can delete it to conserve space.
To update a channel’s player options:
1. Click Browse Channels and browse to the channel you want or select the channel in Favorite Channels. Click the channel’s title to see additional channel management options.
2. Click Player to view the Player Options page.
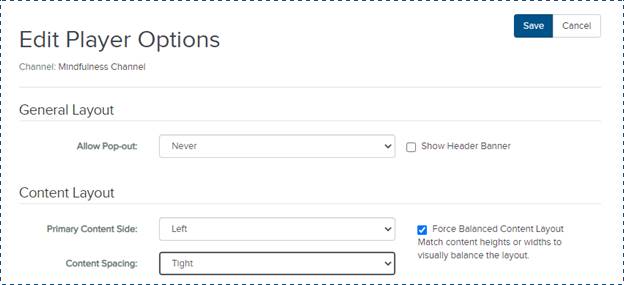
3. Choose the general and content layout for the player:
|
Option |
Settings |
|
Allow Pop-out |
By default, users will have the option to pop-out the Player whenever it is embedded in a web page. The options are: When embedded, Never, or Always. |
|
Show Header Banner |
Clear this check box if you don’t want a banner image displayed across the top of the player. |
|
Primary Content Side |
Select where the larger media element will be located. |
|
Content Spacing |
Select how you want the content spaced out in the player, that is, how close the media elements are to each other and the edge of the player. For example, when None is selected, all media elements touch and go to the edge of the player. |
|
Force Balanced Content Layout |
Select this check box to have the player automatically adjust the heights and widths of the media elements so that they match and balance the layout. |
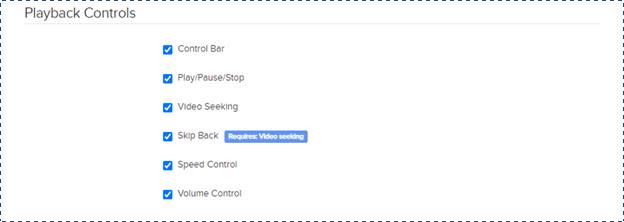
4. Select the playback controls you want to include:
|
Option |
Settings |
|
Control Bar |
Clear check box if you want to hide all buttons (play, pause, stop, navigation controls, polls, questions, etc.), on the bottom of the player. |
|
Play/Pause/Stop |
Clear check box to hide the play, pause, and stop buttons. The presentation will start automatically when a user launches it in the player. |
|
Video Seeking |
Clear check box to disable users’ ability to navigate through the presentation using the controls. All the controls used to skip around in the presentation are disabled (timeline cursor) or hidden (skip back, search slides/captions). |
|
Skip Back |
Clear check box to hide the skip back button that allows users to go back in the presentation in 2 second intervals. |
|
Speed Control |
Clear check box to hide the Adjust Playback Rate button that allows users to increase or decrease the playback speed of the presentation. |
|
Volume Control |
Clear check box to hide the Volume control button. |
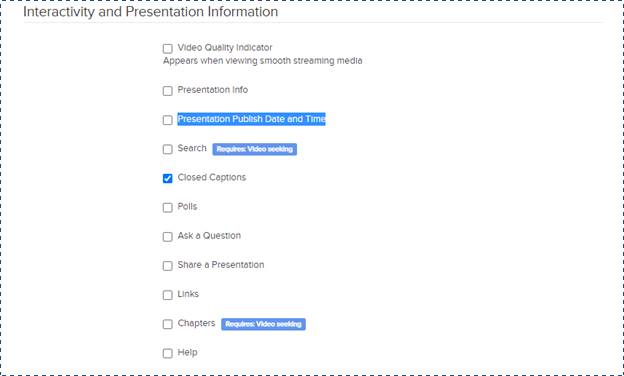
5. Select the interactivity and presentation information you want to include:
|
Option |
Settings |
|
Video Quality Indicator |
Clear check box if you don’t want to display bar graph that shows which video streams are being used. This feature is only available for presentations with smooth streaming content. |
|
Presentation Info |
Clear check box to hide the Presentation Information button that allows users to view the presentation’s date and time along with its title, description, presenter, and length in the Player’s Info tab. |
|
Presentation Publish Date and Time |
Clear check box if you don’t want to include information listing when a presentation was first published to Mediasite. |
|
Search |
Clear check box to hide the buttons (search slides, search captions) that allow users to search for word phrases in the presentations slides (OCR) and added closed captions. |
|
Closed Captions |
Clear check box to hide the Closed Captions button that allows users to display and hide closed captions added to an on-demand presentation. |
|
Polls |
Clear check box to hide the Polls button that users can use to answer polls that have been added to a presentation. |
|
Ask a Question |
Clear check box to hide the Ask button that users can use to ask the presenter questions. |
|
Share a Presentation |
Clear check box to hide the Share button that allows users to share the presentation’s link with others. |
|
Links |
Clear check box to hide the Link button that users can use to view added links to supplementary materials. |
|
Chapters |
Clear check box to hide the Chapters button that allows users to search through a presentation with chapters added. |
|
Help |
Clear check box to hide the Help button that users can use to view the bundled help included with the Player. |
6. Update the graphics to customize your channel player:
|
Option |
Settings |
|
Graphics |
Select an image from the drop-down list to update it. The selected image will appear in the Image Preview. |
|
URL |
To link the image to a web address, enter the URL. When a user clicks on the banner image in the player, the specified web address will load in another browser window. |
|
Banner Image |
To update the image, click Select and locate the file with the image you want to use. The image you choose should be the size specified in parentheses. The image preview appears directly below. |
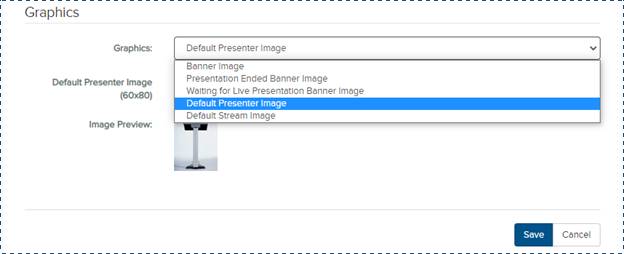
7. Click Save.