Use the Web Editor to remove portions of your presentation. You can insert plain cuts as well as faded and dissolved cuts.
To insert a cut within a presentation:
1. In the timeline, select a portion to cut by clicking and dragging, or "scrubbing" the timeline cursor.
2. Click Cut Time and specify the type of cut:
|
Option |
Details |
|
Insert a cut |
Press C to insert a cut. At a cut, the presentation simply skips to the end of the cut and continues the presentation. |
|
Faded cut |
Press F to insert a cut with fades. Fades gradually darken video to black and mutes the audio level. |
|
Dissolved cut |
Press D to insert a cut with dissolve. Dissolves smoothly fade in and out from one end of the cut to the other. |
3. Adjust the lengths of the cut and fade (or dissolve) using the cut and fade handles, respectively.
4. Move the selection handle to move the cut. Click the selection handle to display a drop-down menu you can use to change your cut option.
5. To retain a portion of the timeline that lies within a cut segment, use the timeline cursor to select the portion you want to retain and click Uncut Time.
6. Click Undo or Redo to back out of changes as needed. Once you have completed your edits, commit changes.
|
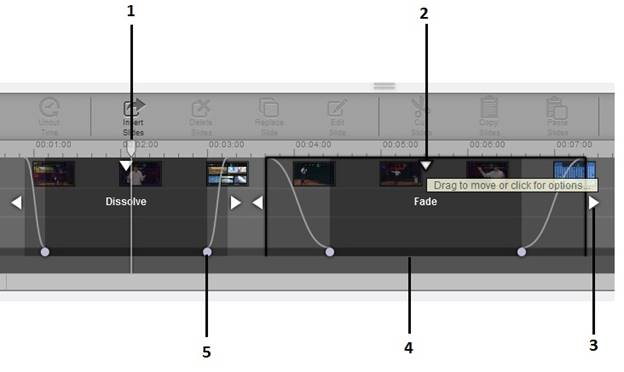
1 |
Timeline cursor |
|
2 |
Selection handle. Drag to move cut or click to choose type of cut to insert. |
|
3 |
Cut handle. Drag to change the length of the cut. |
|
4 |
Cut area. Video, slides, and chapters within the darkened area are not seen in the final presentation. |
|
5 |
Fade handle. Click and drag to change the duration of the fade. |