When you add a room configuration, you will associate templates with it. A template’s settings define how presentations are created, published and the media format types available. You can create custom presentation templates for use with your Recorder room configurations.
Sample naming and description conventions
When adding a room configuration, it is helpful to use a consistent naming scheme and to include the recording capabilities in the description so users adding rooms will have guidelines to follow.
The table below illustrates a sample room configuration scheme that an organization might use:
|
Example Title |
Example Description |
|
Platinum level |
Recorder room configuration for use in medical school operating theater, large lecture halls (auditoriums) •RL830 •3 video inputs, 1 slide •2 video inputs, 1 slide •Video/slides both have OCR |
|
Gold level |
Recorder room configuration for use in distant learning production studio, medium size lecture halls, and labs: •RL830 •2 video inputs, 1 slide •1 video, 1 slide •Video/slides both have OCR |
|
Silver level |
Recorder room configuration for use in distant learning production studio and small lecture halls/ classrooms: •RL120 •1 video, 1 slide •video only •Video has OCR |
|
Silver level (Catch) |
Catch room configuration for use in distant learning production studio and small lecture halls/ classrooms: •Catch device •1 video, 1 slide (Slideshow and video) •Screencast and video •video only |
|
Bronze level |
Catch Configuration for internal (faculty/staff) training production studio: •Catch device •Screencast and audio •Slideshow and audio •Video only |
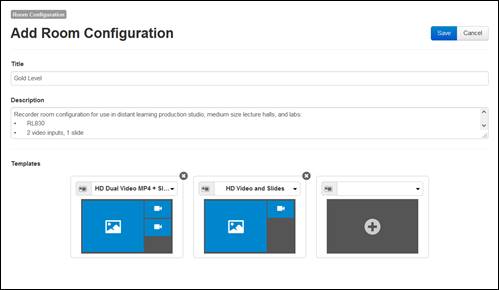
To add a room configuration:
1. Click Recording > Room Configuration > Add New. From the Add New drop-down list you will select Recorder Configuration.
2. Enter a title and description for the room.
3. Select templates for the room. When you add a room, and select a room configuration for it, the room inherits these templates.
4. Click Save.
Recorder room configuration